Have you watched Netflix’s Wednesday?
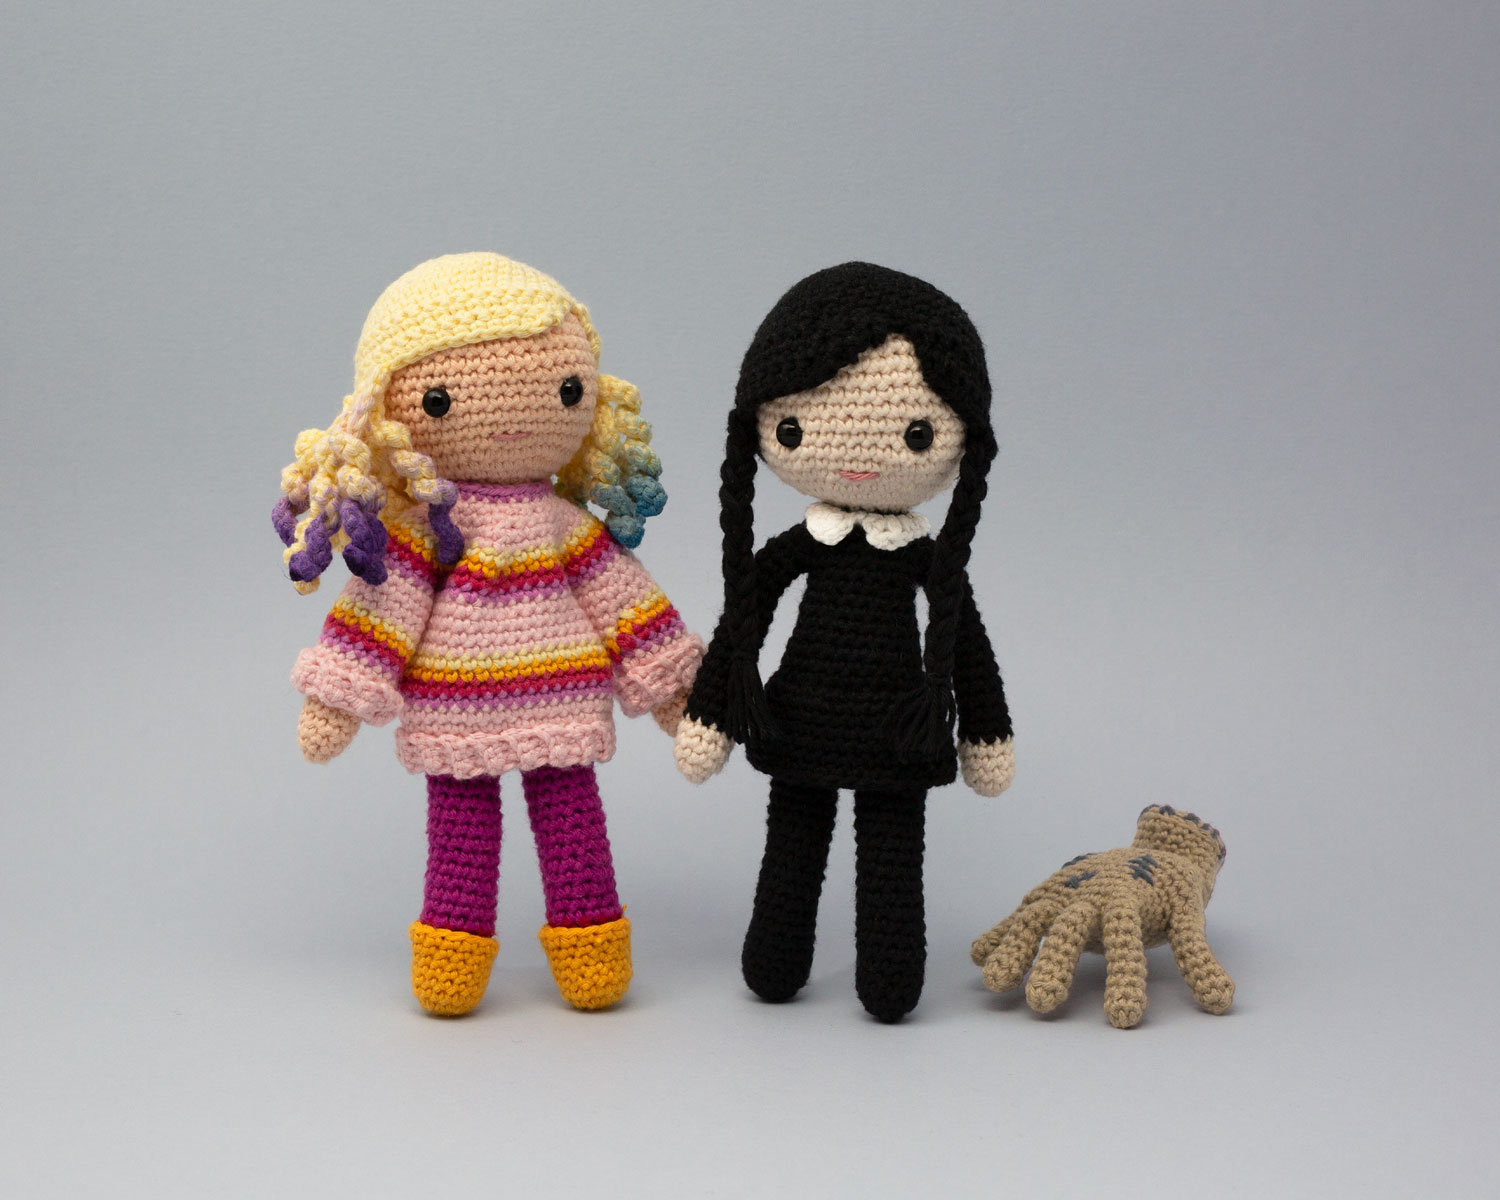
My son watched every episode and then said I would like it. So he watched the whole series again with me. I really enjoyed it. And even though I have many other projects to get finished, I had to crochet Wednesday and Enid right away! Here I will show you how I made both amigurumi dolls based my Christmas Doll pattern. I will show you how I adapted the pattern and added new elements to create these two characters.

To make Wednesday and Enid you will need:
- A copy of my very easy to follow ‘Christmas Doll‘ Pattern
- DK cotton yarn (I’ve used Ricorumi)
- 2.5mm hook
- Toy filling
- 2 pairs of 7.5mm safety eyes
- Tapestry needle
- Stitch markers
Abbreviations
R Round
ch Chain
sc Single crochet
hdc Half double crochet
dc Double crochet
sc2tog Decrease
sl st Slip stitch
st (sts) Stitch(es)
sk Skip (next st)
This pattern is designed in the amigurumi style, worked in a continuous spiral, use a stitch marker to mark the start of each round.
This pattern is written in US crochet terms.
Color change
Where it states to change color, do it in the last stitch of the round you have just completed (unless otherwise stated).
Start a sc as normal, but for the last part of the stitch (yo and draw through 2 loops), yo with the new color ready to start the next round.
For a more seamless color change make the next stitch in the new color a slip stitch (rather than a single crochet) which will count as the first stitch. This will help on the stripes of Enid’s jumper.
Make Enid
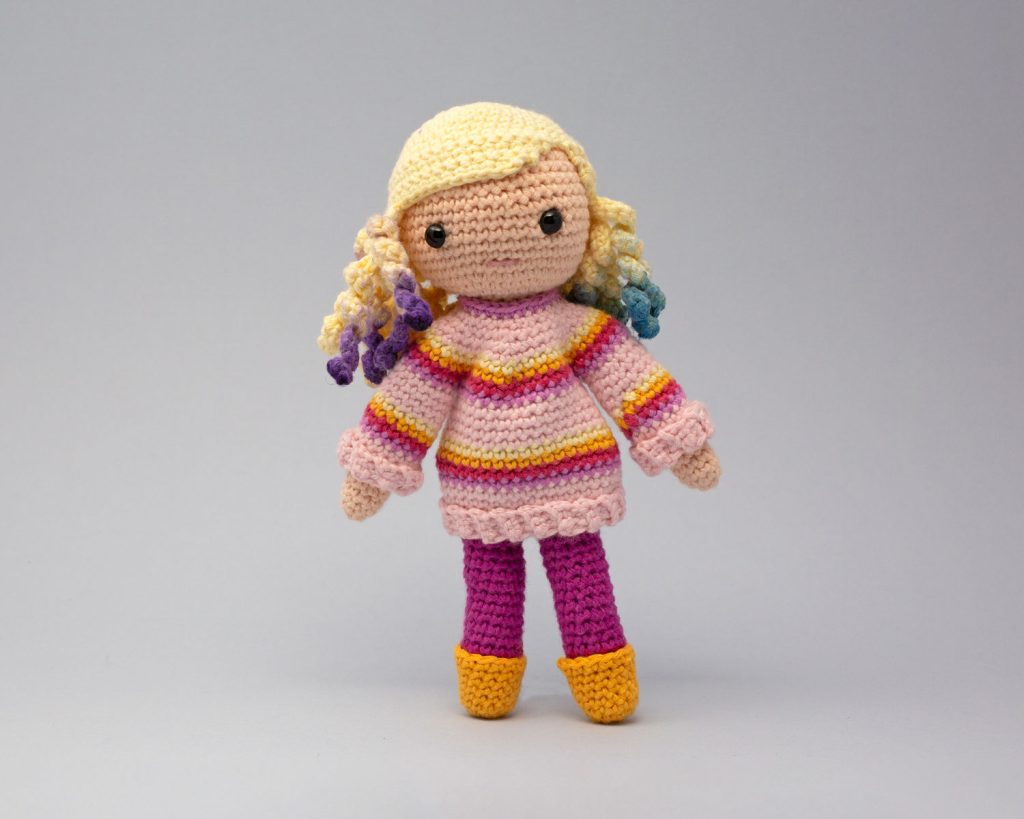
Step one – Enid’s Body & Hair
Using the Christmas doll pattern make the main doll and hair as per the pattern in the same colours.
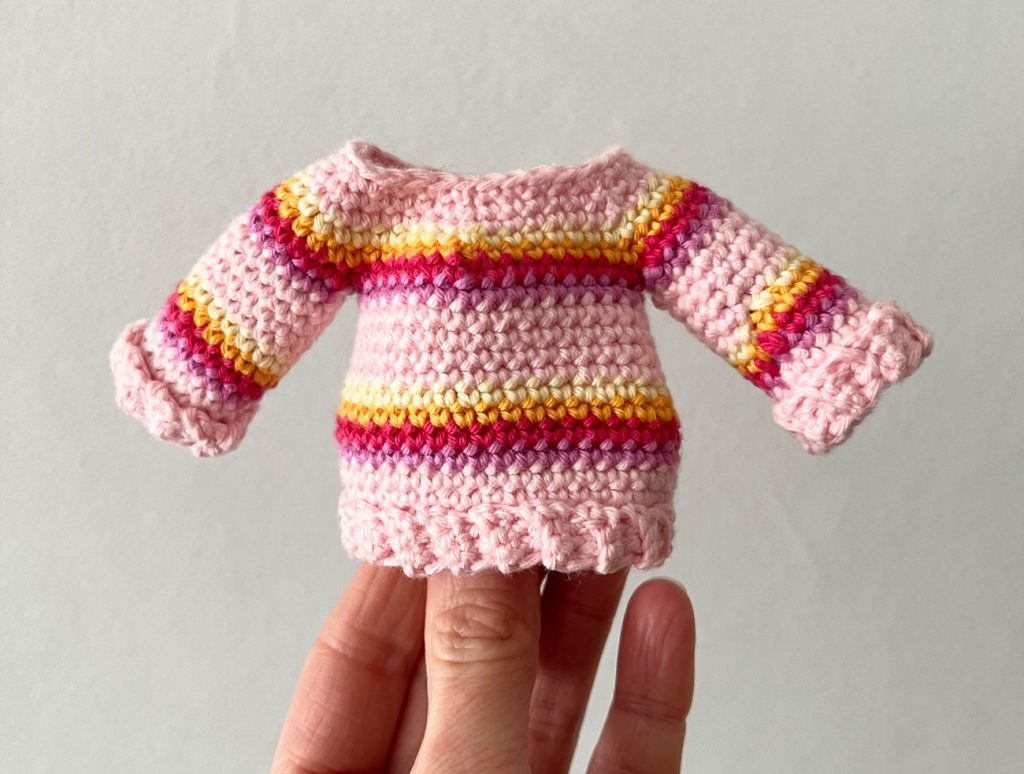
Step two – Enid’s Jumper
The jumper is based on the jumper for the Christmas doll but with a few changes, so below is the full pattern for the jumper:
(Colours required if you are using Ricorumi yarn: 011 Pink, 016 Orchid, 013 Raspberry, 026 Tangerine, 005 Vanilla).
Jumper sleeves (make 2)
Ch 16 in Pink then join to the first ch with a sl st to create a loop. Do not turn.
R 1 Ch1 (does not count as a st), sc in same st, sc in each st around. (16 sts)
R 2 Skip ch st and sc in each st around. (16 sts)
R 3 Sc in each st around. (16 sts)
Change colour to Orchid.
R 4 Sc in each st around. (16 sts)
Change colour to Raspberry.
R 5 Sc in each st around. (16 sts)
Change colour to Tangerine.
R 6 Sc in each st around. (16 sts)
Change colour to Vanilla
R 7 Sc in each st around. (16 sts)
Change colour to Pink
R 8 Sc in each st around. (16 sts)
R 9 sc2tog, 14sc.(15 sts)
R 10 Sc in each st around. (15 sts)
R 11 sc2tog, 13sc. (14 sts)
Change colour to Orchid.
R 12 Sc in each st around. (14 sts)
Sl st in next st to close the spiral. Fasten off leaving a long tail for sewing. Pm in next st.
Jumper body
Ch 38 in Pink then join to the first ch with a sl st to create a loop. Do not turn.
R 1 Ch1 (does not count as a stitch), sc in same st, sc in each st around. (38 sts)
R 2 Skip ch st and sc in each st around. (38 sts)
R 3 Sc in each st around. (38 sts)
Change colour to Orchid.
R 4 Sc in each st around. (38 sts)
Change colour to Raspberry.
R 5 Sc in each st around. (38sts)
Change colour to Tangerine.
R 6 Sc in each st around. (38 sts)
Change colour to Vanilla.
R 7 (sc2tog, 17sc) 2 times. (36 sts)
Change colour to Pink.
R 8 Sc in each st around. (36 sts)
R 9 (sc2tog, 16sc) 2 times. (34 sts)
R 10 Sc in each st around. (34 sts)
R 11 (sc2tog, 15sc) 2 times. (32 sts)
Change colour to Orchid.
R 12 Sc in each st around. (32 sts)
Change colour to Raspberry.
We will now join the sleeves in the same way we joined the arms of the doll.
R 13 Starting in marked st on first Sleeve (see image D), 14sc, starting in next st on Jumper Body, 16sc, starting in marked st on second Sleeve, 14sc, starting in next st on Jumper Body 16sc. (60 sts)
Change colour to Tangerine.
R 14 (sc2tog, 8sc) 6 times. (54 sts)
Change colour to Vanilla.
R 15 (sc2tog, 7sc) 6 times. (48 sts)
Change colour to Pink.
R 16 (sc2tog, 6sc) 6 times. (42 sts)
R 17 (sc2tog, 5sc) 6 times. (36 sts)
R 18 (sc2tog, 4sc) 6 times. (30 sts)
Secure you work with a st marker. We will finish the jumper neck when it is on the doll. If there are holes under the arms sew these closed with the tail end from making the sleeves.
All tail ends can be tied together inside the jumper and cut as they will not be seen, or weave them in if you prefer.
Jumper cuffs (make 2)
Ch 4 in Pink.
Row 1 Sc in 2nd ch from hook, sc in each ch to end, turn. (3 sts)
Rows 2-16* Ch1, in BLO sc in each st to end. (3 sts).
*You may need to adjust the number of rows so the length fits the sleeve of your jumper.
Fasten off leaving a long tail for sewing on.
Pin the cuffs at the bottom of the sleeve then sew in place.
Jumper bottom trim
Ch 4 in Pink.
Row 1 Sc in 2nd ch from hook, sc in each ch to end, turn. (3 sts)
Rows 2-40* Ch1, in BLO sc in each st to end. (3 sts).
*You may need to adjust the number of rows so the length fits the bottom of your jumper.
Fasten off leaving a long tail for sewing on.
Pin the trim at the bottom of the jumper then sew in place.
Slide the sweater onto the doll from the feet up. It will be a tight fit but it should go on. You can hook the end of the arms onto your hook to pull them through the sleeves.
Next, finish off the neck of the jumper. Continue from ‘jumper body’:
R 19 (sc2tog, 3sc) 6 times. (24 sts)
Change to Orchid.
R20 sc in each st around. (24 sts)
Sl st in the next st to close the spiral. Weave in ends.
Step four – Make Enid’s Shoes (make 2)
R 1 Make a magic ring in Tangerine, 7sc into ring. Pull ring tight. (7 sts)
R 2 2sc in each st around. (14 sts)
R 3-8 sc in each st around. (14 sts)
Sl st into the next st to close the spiral. Fasten off and weave in end.
Step five – How to colour Enids hair
Colouring the hair for Enid was a bit of an experiment but I’m pretty pleased with the way it came out. I used watercolour paint to do this. I added water to the right colour in my paint palette until I got a really saturated pigment. I then dipped the end of a hair curl in water and then into the paint. I kept dipping in paint and then water and used my fingers to rub it in a little. Finally I used some kitchen paper to soak up some of the excess and lighten it a little. I have a video of me doing this over on my Youtube channel.
Please note using watercolour may result in the colour fading if the doll is washed and it will not be suitable to give to small children.
Make Wednesday (from Netflix’s Wednesday series)
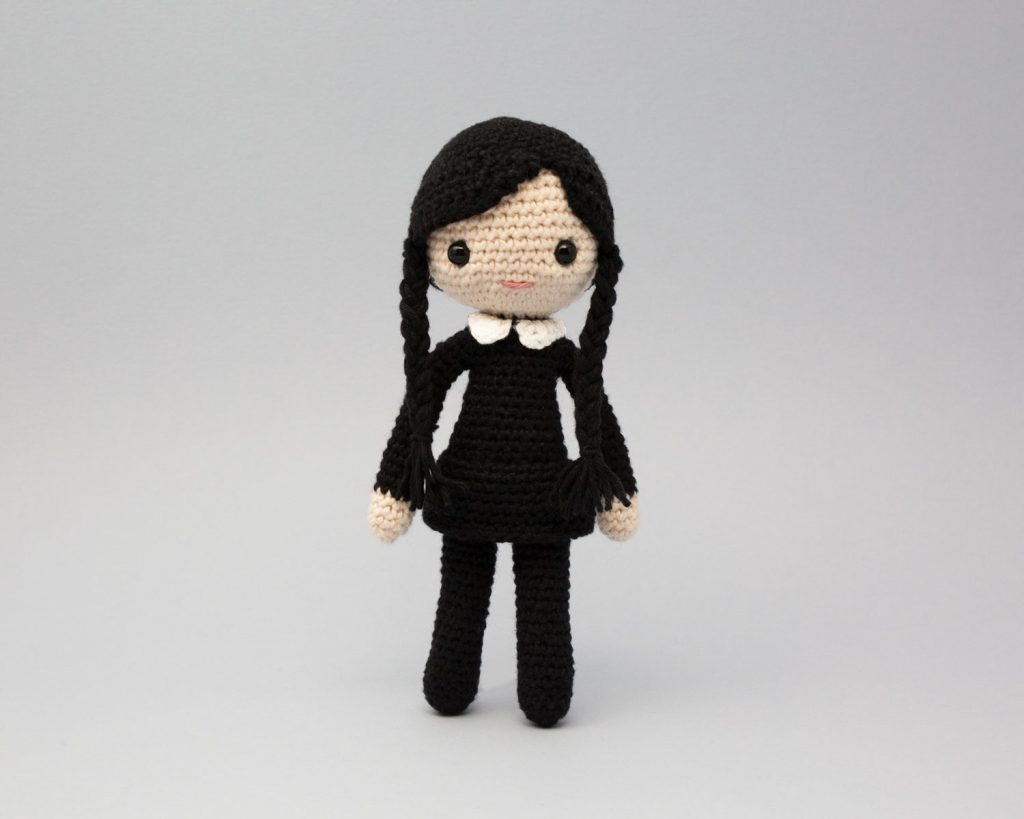
Step one – Wednesday’s Doll Body
Make the Christmas doll pattern with these colours and changes:
Colours Ricorumi 061 Ivory for the skin, 060 Black for the clothes, 001 White for the collar.
Arms Start with skin colour then change to Black after round 5.
Legs & Body Make all in Black
Body In round 8 make all sc into the back loops only (this is to attach the skirt later).
In round 21, just after you’ve change to the skin colour, make all sc into the back loops only (this is to attach the collar later).
Head After you’ve added the eyes, make the collar and skirt below. It’s easier to crochet these now rather than when the head is finished.
Step two – Wednesday’s Collar
Row 1 Hold doll upside down and, leaving a long starting tail, join White to the front loop of the front centre st of round 20, ch 1, 1sc in same st, 16sc (last st will be in the same st as you started). (17 sts)
Row 2 Ch3, 1dc, 1hdc, 13sc, 1hdc, 1dc. (17 sts)
Fasten off and weave in ends.
Step three – Wednesday’s Skirt
Row 1 Hold doll upside down and, leaving a long starting tail, join Black to the front loop of a st on the side of the Body of round 7, ch 1, 2sc in same st, 11sc, 2sc in the next st, 11sc. (26 sts)
Row 2 Sc in each st around. (26 sts)
Row 3 Sc in each st around with 2 increases, one on each side of the doll. (28 sts)
Row 4 Sc in each st around. (28 sts)
Row 5 Sc in each st around with 2 increases, one on each side of the doll. (30 sts)
Row 6 Sc in each st around. (30 sts)
Row 7 Sc in each st around with 2 increases, one on each side of the doll. (32 sts)
Fasten off and weave in ends.
Step four – Wednesday’s Hair
Make the hair as shown in the Christmas doll pattern upto round 15 in Black. Fasten off and weave in ends.
Next, cut 12 lengths of Black yarn roughly 25cm in length.
Thread 6 strands through 3sts from the last round on each side of the head, (2 strands per st on each side of the head). Do not attach by looping – pass one end all the way through making sure the ends are at the same level.
Make the plaits. Tie with black yarn at desired height and trim.
Thing

You can make Thing too from my Halloween severed hand pattern. Make the hand from the pattern, just don’t make the last few (red) rounds or the bones. Instead, crochet a circle upto 18sts in the same colour and sew it to the opening. Then add some details for the stitches.
Don’t forget to tag me on Instagram so I can see your makes.